Main interface
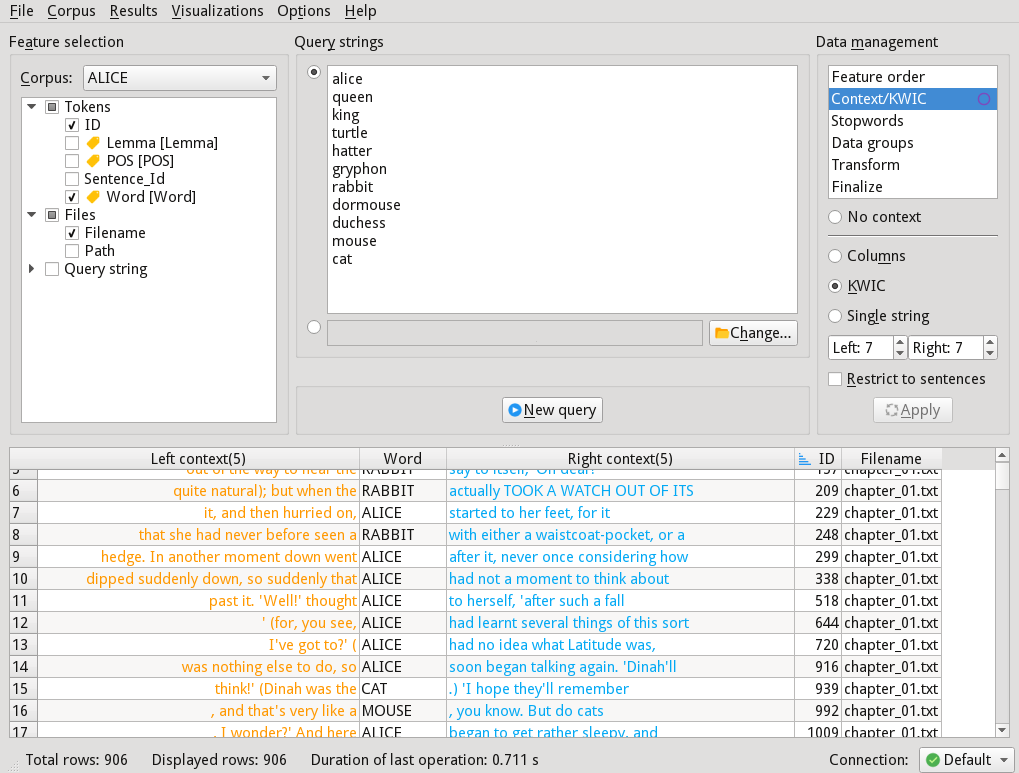
The main Coquery interface.
Corpus selector
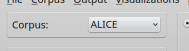
The corpus selector.
The corpus selector is a drop-down menu that can be used to change the currently active corpus. If you click on the selector, a list of all corpora that have been installed for the current database connection (see Database connections for details) will be shown. By clicking on an entry in the list, that corpus becomes now the active corpus.
Changing the corpus can change the selected output columns in the Output column tree. If a currently selected column is internally mapped on the same database structure in both the current and the new corpus, the column will be selected also for the new corpus.
Functions and linked tables will be discarded if the corpus is changed.
Context options
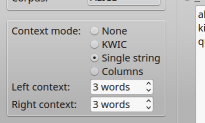
The context options.
If you wish to include token contexts in the results table, you can choose one of the available context modes:
- None (no context is included)
- KWIC (the left and the right contexts are included as separate context columns)
- Single string (the left and the right context together with the token itself is included as a single context column)
- Columns (for each word in the left and the right context, a separate context column is included)
The entry fields Left context and Right context specify the number of tokens that will be included in the respective context. Possible values range from zero (no context) to 99.
Note
Depending on the corpus, a token may also be punctuation mark, so the actual context may contain less words than the specified number of context tokens
Stop words

The Stop words button.
Clicking on the ‘Stop-words’ button opens the Stop words dialog.
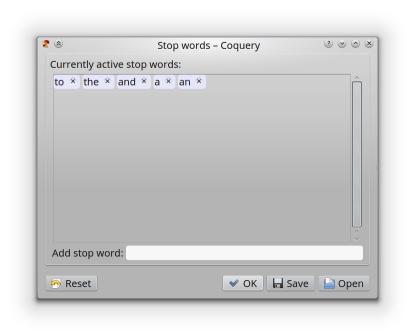
The Stop words dialog.
Stop words are words that are ignored in a corpus query, and which do not appear as tokens in the results table. Very often, function words with very high corpus frequencies are treated as stop words. In the Stop word dialog shown above as an example, the words to, the, and, a, and an are currently active stop words.
In order to remove a stop word, click on the marker to the right of it in the stop word list. In order to enter a new stop word, type the word into the entry field, and press return. The new stop word will be listed as active.
In Coquery, stop words use the same syntax as query string items. Thus, it
is, for example, possible to specifcy the stop word ??, which treats all
words as stop words that consist of exactly two letters. See Query syntax
for details.
Click the ‘Reset’ button to remove all stop words. Click the ‘Save’ button to store the list of currently active stop words to a text file. Click the ‘Open’ button to read a list of words from a text file that will be added to the active stop words. Click the ‘Ok’ button to close the dialog.
Query strings
The syntax of query strings in Coquery is described in detail in Query syntax.
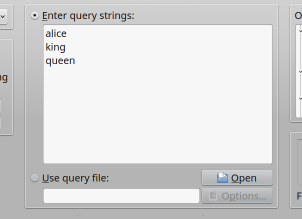
The query string entry field and the query file selector.
There are two ways of specifying the query strings for the next query: either by typing them into the query string entry field, or by reading them from a text file.
With either method, it is possible to process more than one query string with a single query command. For example in the screenshot above, three query strings are specified: alice, king, and queen. If the ‘Query’ button is clicked, the three query strings will be queried one after another, and the reasults of each subquery will be added to the results table.
In order to read query strings from a text file, enter the file name in the query file entry field, or click on the ‘Open’ button. Each line from the selected text file will be considered a query string.
If the the text file contains tabular data, you can click on the ‘Options’ button to specify the format of the text file. The Input file dialog will appear:
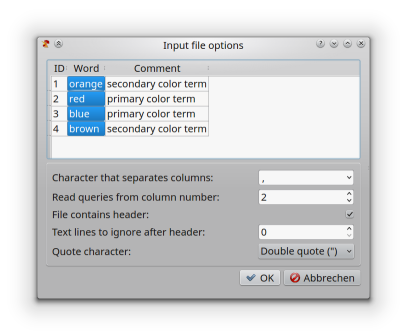
The Input file options dialog.
The field ‘Character that separates columns’ can be used to specify the
character that separates the columns in the text file. Either enter the
charater in the field, or choose a pre-defined character from the drop-down
menu. Select {tab} if the text file uses tabulator characters as
separators.
The column that contains the query strings can be specified either by clicking on the column in the preview area, or by typing in the number in the respective field. In the screen shot, the second column contains the query strings.
Check the box ‘File contains header’ if the first line in the text file contains the column names of the table. This line will not be used as a query string.
It is possible to skip some lines in the text file by entering a number in the field ‘Text lines to ignore after header’. These lines will be ignored in the query.
If the text file uses either single or double quotation marks as quoting characters, these marks can be selected from the drop-down menu.
Output columns
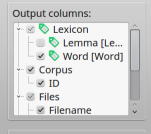
The Output columns tree for the corpus ALICE.
The Output column tree specifies the columns that will be included in the next query. The results table will contain columns for each output column with a checked box. You can check and uncheck the boxes by clicking on them. In the example, the columns Word from the table Lexicon, ID from the table Corpus, and Filename from the table Files are selected.
Columns marked by the tag icon  are colums that are mapped on the query
item type given in brackets after the name. In the example, the column Word
from the tabe Lexicon is mapped onto the query item type ‘Word’, i.e. a
query item that contains a word specification will be matched against this
column.
are colums that are mapped on the query
item type given in brackets after the name. In the example, the column Word
from the tabe Lexicon is mapped onto the query item type ‘Word’, i.e. a
query item that contains a word specification will be matched against this
column.
Note
Columns mapped onto query item types can be unselected, and the query
item will still be evaluated correctly. For example, it is possible to
have the lemma item [queen] as the query string without selecting
that column in the results table.
Right-clicking on an output column opens the Output column submenu, from which the Unique value viewer, the Add function dialog, and the External link dialog can be opened.